As the temperatures begin to rise and the sun comes out more each day, these signs from nature indicate that the spring season is right around the corner! Before we know it there will be new life, blooming flowers, and vibrant colors everywhere we turn, making it the perfect time to spend time outdoors. If you’ve thought about either creating or enhancing a spring garden on your property, now is the perfect time to use North Georgia Brick for a quick weekend project that’s easy to complete.
We love these DIY-friendly brick projects from HGTV that will not only allow you to enjoy your time outside more, but also increase your property’s resale value! You can use standard brick, clay pavers, and thin brick in any color you prefer to make a standout architectural feature come to life.Here are 3 easy brick projects we love to complete your outdoor garden area:
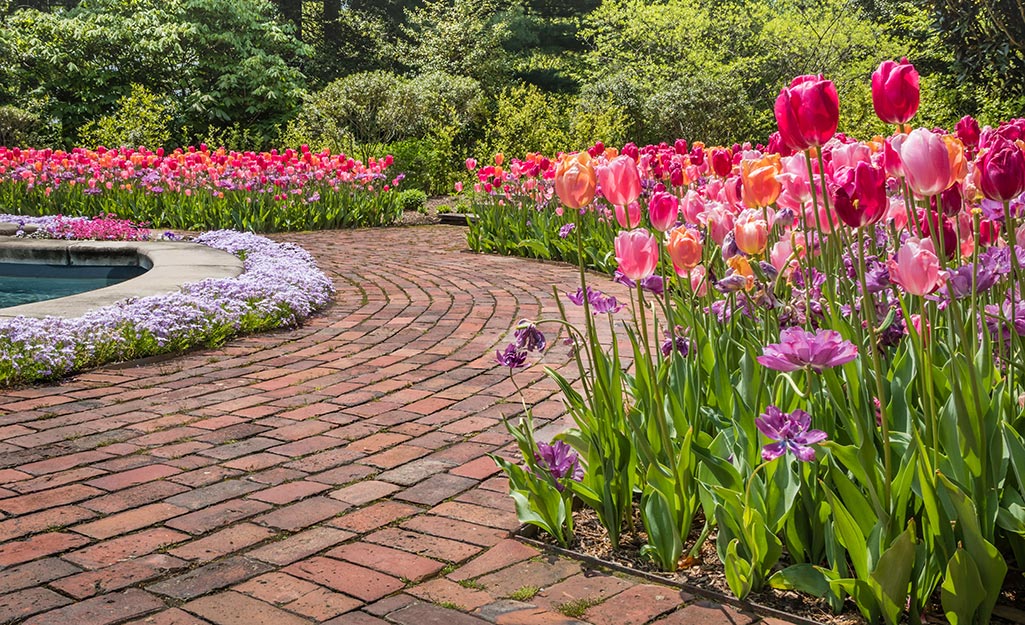
DIY Brick Paver Walkway
Consider creating a custom brick garden pathway leading from either a side home entrance or patio, to or through your designated garden area, using authentic clay pavers!
Easy to maintain and resistant to sunlight, brick pavers allow you to easily create a walkway that doesn’t require sealing like concrete does:
- Plot your path: Mark your path with wood stakes and twine.
- Pick a brick pattern layout: Running Bond, Herringbone, Basketweave, or Stack Bond.
- Dig the trench: The depth of the trench should be 1 inch deeper than your brick height, and using a flat shovel will keep the area level.
- Install edging along the path: Plastic edging will be easy to manipulate, and you can anchor the edging with spikes.
- Add 1 inch of contractor sand within the pathway and tamp the sand.
- Lay the bricks: We recommend real clay bricks since the color lasts forever under bright sunlight. Beveled edges will help prevent the bricks from chipping when the path is used.
- Sweep poly sand into the joints and brush excess off the top of the path.
- Use a rubber mallet to level uneven bricks into the sand.
- Set the sand with water and wait 24 hours before using the path.


DIY Brick Spiral Garden
For decorative outdoor design elements, brick is perfect for creating garden planters that hold your favorite flowers and herbs.
We love this eye-catching concept for a brick spiral garden that elevates your yard. Impress your visitors with this spiral herb garden using your favorite brick:
- Mark your design with a 4-foot diameter, then stake and string a perfect circle.
- Dig the circle down 5 inches deep.
- Install flexible edging and add 1 inch of coarse grit sand.
- Choose your favorite brick color and fill in the circle with bricks to create a sturdy base.
- Sweep sand into the joints of the brick.
- As you create and build your spiral design with bricks, use masonry adhesive to secure the bricks to each other.
- Fill the inside of your brick spiral with a compost and soil mix.
- Plant hardy herbs such as rosemary, sage, thyme, and oregano at the top of the garden.
- Make sure the center of the spiral garden contains well-drained soil.
- Plant tender herbs such as basil, cilantro, parsley, and chives at the bottom of the garden.
- Top off all the planted herbs with a layer of mulch!
DIY Brick House Number Planter
When guests pull up to your gorgeous home, welcome them with a personalized brick planter that displays your house number proudly.
This project will definitely boost your curb appeal and make your home stand out, which can pay dividends down the line if you list your home on the market.
You’ll need 40 bricks to complete this project:
- Step 1: Make the Base. It’s recommended to use four 4.75” x 19” wooden planks for your base.
- Sand the rough edges and then attach strap tie brackets to secure the planks together to create a platform.
- Put a notch into the middle of two 1 x 6 x 32” boards. Cut off their corners at a 25-degree angle. Now cross and insert the boards at their notch intersection to create the base stand. Attach the base stand to the platform with L brackets.
- Drill 1-inch drainage holes into the platform.

- Step 2: Build The Planter. Place the wooden base on the ground with the platform facing upward, and line bricks around the edge of the platform.
- Use landscaping adhesive to secure the bricks as you build up the perimeter of the brick number planter, and let the planter dry for 24 hours.
- Use waterproofing spray on the inside of the brick planter and staple landscaping fabric to the wooden base inside the planter.
- Step 3: Add House Numbers. Drill masonry screws into the outside of the brick planter where you want the house numbers to go and add your numbers to the planter.
- Step 4: Add plants! Use soil, compost, and mulch to ensure that your favorite flowers and plants will thrive once planted inside the brick planter.
The best part about all these fun weekend projects is that brick is weather-tolerant– and you won’t have to spend time maintaining them once complete. Now you can spend more time enjoying your garden with family and making memories. Visit the experts in our Cumming, Cartersville, Newnan, or Lovejoy locations to pick out your brick and begin your project today!
Recent Comments